
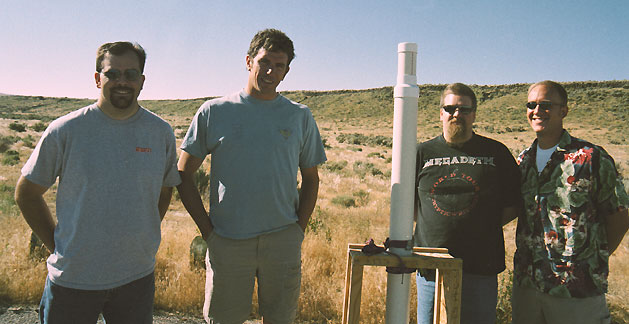
Plans for Bedroc 2003 began in late May over a Meat-lovers pizza (mushrooms instead of sausage please) at Shy Simon's Pizzeria. What would be the main attraction now that the infamous Death Probe had seen it's final flight? Tim was the first to suggest a water rocket. I thought he was joking... you mean one of those kids toys with the foot pump? No. Tim had on his poker face and if he was bluffing, there was no sign of it. Once the rest of us caught on to the idea, things began to click.
There was a lot of work to be done. We had to find a suitable motor tube. One that could hold, what 80 psi? Why not 100, or 200 psi? Could we possibly go to 300 psi? Six inch PVC seemed to be the size of choice, yeah, eight to ten feet tall aught to do it, we thought. What would we use to pressurize something that high? How would we, fill, pressurize and release the rocket? Would it be too heavy? Would it be too dangerous? All questions that would need to be answered before launch day.
We began a two pronged effort. On the scientific front, we ran simulations with rocket sim software (yes, there are such programs) while simultaneously satisfying our Neanderthal-let's-blow-stuff-up lobe by building a test cell and trying out different nozzles and motor tubes.
Our first high pressure test was conducted one afternoon in Dan's driveway. We used 4-inch ABS pipe for this test. We simply glued caps on both ends of the pipe, one of which had a regular compressors nipple bolted through it's face. The idea being if we could get enough thrust with the compressor fitting, we would release the hose at the quick coupler and the nipple would become the nozzle. We suspected a couple of issues with this test. First, we were spectacle of the ABS pipe. We had seen specs showing that it was much weaker than PVC of the same diameter, but it was cheap and easy to find so we tried that first. The second issue was the glue we used to piece it together. Having no ABS glue on hand, we used what we had... two year old PVC glue. This glue had the consistency of... mmm... pancake syrup after it has been stuck to the table for a couple of days. Needless to say, we didn't really think it would hold much pressure. We made bets on when it would blow. Nobody thought it would hold much above 100psi.
Following standard safety procedures, we stuck the pipe in a five gallon bucket just in case it blew up and moved the cars farther down the road. Then we adjusted the compressor's regulator to allow the highest possible hose pressure. Slowly, we cranked it up. 50, 100, 120, 145. The compressor was maxed out and the pipe held. We were shocked, and surprised. Forty-five seconds later, we got our second surprise. With a bang who's echoes lingered for seconds, the motor shot out out of the bucket and took it's one and only flight to an altitude of about twenty feet, towing an air compressor hose along with it.
Lessons learned: This just might work after all, the pipe held better than we thought even with the bad glue. And, failures can be slow.
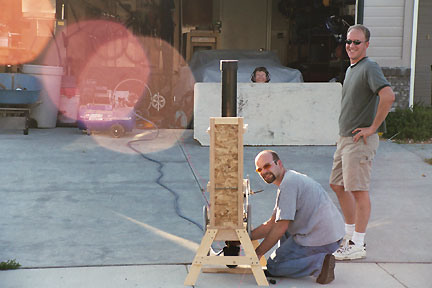
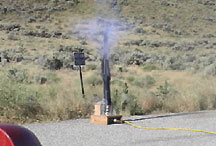
It was time ratchet up the tests. A test cell was built that would record the thrust of the nozzle. For these tests, we again used ABS pipe, but this time we used ABS glue too. We also began hiding behind blast shield in case of catastrophic failures, and began photographic documentation of our progress. We used my compressor for these tests, which maxed out at 125 psi. This time we used the largest compressor fittings that we could find. Still not the 3/4 inch nozzle that the sims called for, but getting closer.

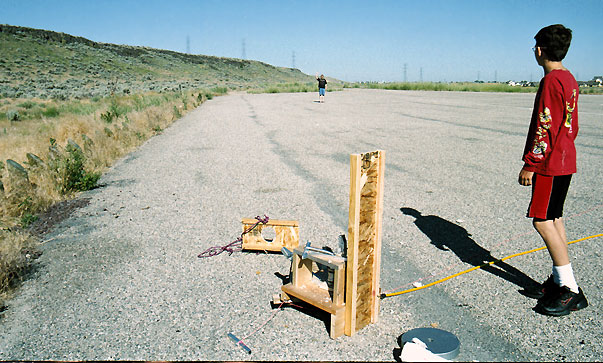
A remote release mechanism was devised that allowed the release of the nozzle coupler from a safe distance. The main problem with this was it was more difficult to trigger as the pressure increased.
These were the first tests where we used water. We quickly discovered a few new issues with our plan. First, loading the water would be a challenge. We would have to load it through the nozzle, but that meant inverting the motor, loading the water, the re-inverting it without leaking water. Also, once we began pressurizing the motor, if we stopped air flow going into the motor, water would drain down into the pressure hose. Worse yet, if we needed to bleed down the pressure from the compressor end of the hose, ALL of the water would be force up the hose and drain out the bleeder valve.
We also decided at this stage, that we needed more pressure. We really had no idea how much pressure the motor would hold and we weren't about to settle for 145 psi if we didn't have to. We would needed a bigger compressor... or did we?
Enter scuba. A scuba tank holds 3000 psi, far and above our wildest high pressure dreams. Not only that, it eliminated the need for a compressor and generator at the launch site. A stop at the local scuba shop provided us with the requisite yoke and valve. With Dan's gauge and high pressure hose, we could go to 300 psi without any additional hardware. For this test, we took the test cell to a remote parking area off of highway 21. We used the ABS motor from the test cell and took it up to 300 psi. Again, a delayed failure. This time it held for about 15 seconds before blowing the end of the cap out. At least the glue held.
This was the last of the pressure fitting nozzles. From now on, we would use 3/4 inch PVC nozzles. We also moved to PVC body tubes. To keep the weight down we first tried the lightest 4-inch pipe we could find. Having learned that the flat face of the end-cap is a weak point, we reinforced the inside of the the cap with a metal plate, a series of adaptors and epoxy. This end-cap wasn't going to blow!

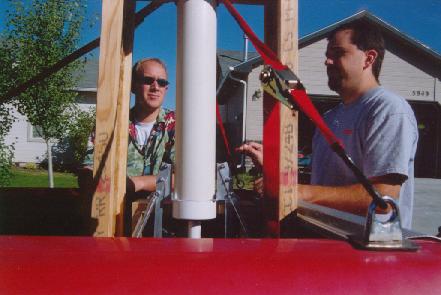
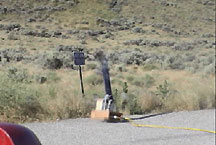
The new nozzle also needed a new release mechanism. The launch pad would have to hold down 300 pounds of pressure, and dock with the nozzle tight enough to hold that pressure, and yet release completely with a simple trigger. It took a couple of design changes, but it looks like we have a solution (partially shown in the photo above).
 We
were felt like we were finally getting close to the
end product. It was time for a full scale
test. We loaded the launch pad and motor assembly into the truck, along
with the scuba tank, hose and a bunch of spare parts, and headed off for the
remote test pad.
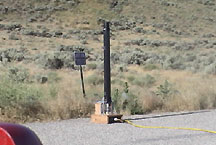
We
were felt like we were finally getting close to the
end product. It was time for a full scale
test. We loaded the launch pad and motor assembly into the truck, along
with the scuba tank, hose and a bunch of spare parts, and headed off for the
remote test pad.
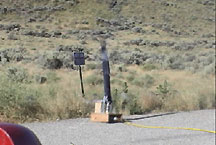
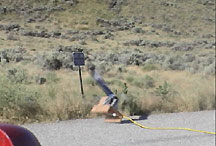
 Hiding
behind the truck, we began pressurization. At just 145 psi, disaster.
The end caps held, but the rocket body disintegrated into thousands of tiny
pieces of shrapnel that sprayed in every direction.
Hiding
behind the truck, we began pressurization. At just 145 psi, disaster.
The end caps held, but the rocket body disintegrated into thousands of tiny
pieces of shrapnel that sprayed in every direction.
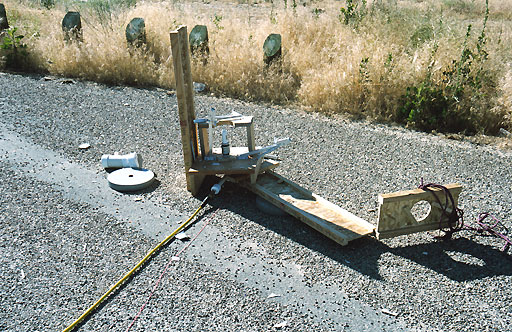
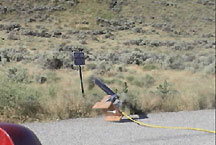
The launch pad was damaged, but not beyond repair.
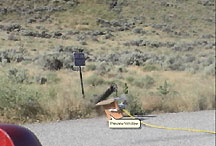
 Tim
found the farthest piece.
Tim
found the farthest piece.
This was an exciting, but very disappointing test. We would have to go to a heavier body tube which would impact the maximum altitude we could attain, and would also result in a lower launch velocity as the rocket cleared the rail, reducing our margin of safety for a stable launch.
After some repair work on the launch pad we built two more motors. This time we went back to ABS for one of the motors, after all, the earlier model held 300 psi even if for only a short time. The second motor was made with a heavier PVC pipe.
Since the previous PVC explosion caused so much damage to the launch pad, we decided to test the ABS motor first. However, again, disappointment would prevail. From the video evidence, and the leftovers of the motor, it was clear that the end caps held, but the body tube itself had failed. More damage was also done to the launch pad. A quick fix and we were ready to test the final motor.


The last test, with a heavier PVC body tube and stronger end caps, took us up to 245 psi. This time, no catastrophe. A crack in the top cap (the known weakest point) quickly dropped the pressure to the double digit range. A beefed up end cap was the final modification.
Since completion of the test phase, we have added reinforcing rings to the motor tube, fins and nose cone. We will complete the recovery system this week, the launch rail and we'll be ready for Saturday (July 19)... launch day. Hope to see you there.